
How to Plan a Vertical Laptop Stand for Closed-Lid Use

Affiliate Disclosure: We may earn a small commission on qualifying Amazon purchases at no extra cost to you. Full disclosure →
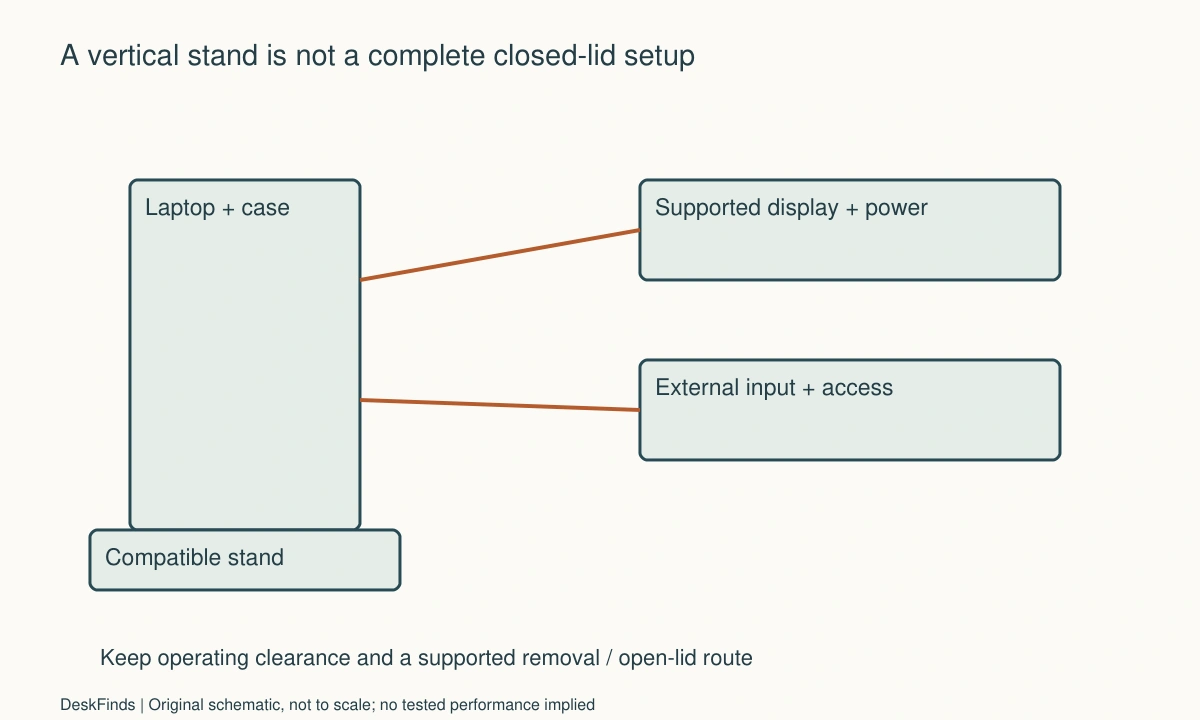
A vertical stand can free part of a desk, but holding a closed laptop is only one part of the arrangement. The computer must support the intended closed-display operation, remain within its operating instructions, and stay accessible for power, authentication, and removal. Choose the stand after checking those conditions rather than assuming a narrow slot creates a complete desktop setup.
Quick answer: Confirm the laptop’s closed-display requirements and external-display limits, then check the stand against the complete laptop-and-case thickness, weight, contact surfaces, and permitted orientation. Keep vents and essential ports unobstructed. Plan power, external input devices, wake behavior, and a supported removal route. Do not close or store a running laptop in an arrangement its manufacturer does not support.
Distinguish storage from operation
A stand suitable for holding a powered-off laptop is not automatically approved for operating it vertically with the lid closed. Read the laptop and stand documentation for the intended use. A product image showing a connected machine is not a substitute for model-specific operating guidance.
Write whether the laptop will remain connected all day, leave every evening, or simply be stored between sessions. Include whether you need the built-in camera, keyboard, fingerprint reader, or power button. Those functions can require opening or removing the laptop, which changes the practical value of the stand.
The one-cable dock compatibility guide covers a frequent companion purchase. A compatible dock does not establish that the laptop may be operated in any physical orientation, and a well-fitting stand does not provide missing video or charging capabilities.
Confirm closed-display requirements
Consult the exact laptop manufacturer’s documentation. Apple’s display troubleshooting guidance, for example, specifies power and external input requirements for a Mac laptop used with a closed lid. Other computers and configurations can differ. Do not transfer a Mac procedure to a Windows laptop or apply one generation’s display limit to another.
Check the supported number of external displays and required connection modes. Closing the lid does not universally increase the number of displays a machine can drive. If the external screen goes dark, compare the documented requirements before changing unrelated sleep settings or buying another cable.
Managed computers may also have accessory-approval or authentication requirements. Apple’s accessory guidance illustrates that permissions can be relevant to a new connection on applicable Macs. Check current official instructions for your host and obtain the necessary organizational approval before making closed-lid operation the only practical desk state.
Measure the complete laptop assembly
Measure the thickness where the stand supports the machine, including any case that will remain fitted. A laptop can taper, have raised feet, or use a thicker hinge edge. Compare the actual contact region with the stand’s documented adjustment and supported dimensions.
Check the weight and the base footprint. A slot range alone does not establish stability or suitability for a heavy device. Use the stand’s compatibility information and intended orientations. Do not force a case into a tight slot, compress a hinge, or add improvised padding to make an unsupported laptop appear secure.
For stand-category context, read the laptop stand guide for thick or heavy machines for a separate physical-support comparison. For a live category comparison, the docking station versus hub guide helps separate the physical support from the connection hardware on the shortlist.
Preserve the laptop’s operating clearance
Identify intake, exhaust, and other areas the manufacturer says to keep clear. Check them in the proposed orientation with the stand fully loaded. Do not assume that a closed lid, a vertical position, or a metal stand always improves cooling. Those are model-specific operating questions.
Avoid enclosing the assembly in a drawer or tight decorative sleeve unless that operating arrangement is explicitly supported. A holder can fit the body while covering a vent or pressing against a feature that should remain clear. Keep the laptop’s own instructions as the reference rather than extrapolating from a different computer’s design.
If operation is abnormal, follow official support guidance and stop using damaged or unsafe equipment. Do not use touch alone to assign a safe temperature or add an improvised fan as proof that an unsupported arrangement is now acceptable. A tidy footprint should not depend on ignoring warnings or documented conditions.
Plan port and cable access
Check the power and video ports with their actual plug bodies attached. A connector close to the supported edge can conflict with the stand. A cable can also pull sideways on a vertically held laptop if its route is too short or anchored poorly.
Leave enough supported slack for ordinary insertion and removal. Support the laptop itself rather than hanging any part of it from a cable. Keep the host lead distinguishable from a charging-only cable if both are present. A replacement cable must meet the electrical requirements as well as fit the available gap.
For the dock’s location, use the small-desk dock placement guide. The laptop, dock, and power supply have separate footprints and operating conditions. A vertical laptop can save surface area while the connected plugs and brick consume some of that gain elsewhere.
Keep a practical open-lid fallback
Decide where the laptop can be opened if authentication, recovery, a firmware prompt, or a built-in control requires it. This does not mean every session needs an open-lid step; it means the room should have a supported way to perform necessary actions without dismantling the workstation.
A narrow gap between a monitor and wall may hold the vertical stand yet leave no room to lift the laptop out. Include hand clearance and the removal height. Do not pull by the screen lid or cable. Follow the computer’s handling and the stand’s adjustment instructions.
If the laptop leaves daily, practice the complete departure sequence, including relevant storage ejection and host disconnection. The portable SSD placement guide explains why a drive can remain physically on the desk while being disconnected by the laptop’s host cable.

Worked example: the camera changed the stand decision
Imagine a hypothetical worker who wants a clean desk for writing and considers a vertical stand behind the monitor. The laptop supports the intended external-display arrangement, but the worker frequently uses its built-in camera for calls and its built-in authentication control after certain events.
The worker lists those tasks before buying a stand. A closed-lid arrangement would need a separate supported camera and a practical way to access authentication when required. The proposed rear location also lacks comfortable removal space. The stand’s narrow slot is not the main constraint; the daily workflow is.
Two plans are compared. One keeps the laptop open on a suitable supported arrangement and preserves the built-in camera. The other uses a verified vertical setup with an external camera and accessible removal route. Both include the dock, power supply, and writing area, so the comparison is between completed workstations rather than the stand prices alone.
In this hypothetical case, either plan could be reasonable depending on task frequency and verified compatibility. The worker does not buy the vertical stand until the missing functions and access are accounted for. The example makes no cooling or performance claim; it shows why the laptop’s daily role belongs in a space-saving purchase decision.
Check wake and reconnect behavior in ordinary use
After assembling a supported setup, test the documented arrival and wake routine with noncritical work. Verify the external keyboard, pointing device, display, and selected audio. Check that any required accessory permission has been handled through official guidance rather than bypassed.
Record a failure precisely: no display, unavailable keyboard, insufficient charging warning, or a prompt requiring the lid to be opened. Those observations lead to different next steps. Do not repeatedly change power settings, firmware, dock cables, and stand orientation together, because the cause becomes difficult to isolate.
If the setup is unreliable only through a dock, compare the supported direct path as appropriate. Physical stand fit is not a diagnosis for a USB problem. Keep the laptop’s operating state, connection chain, and support arrangement distinct in the record so a manufacturer can assess the actual configuration.
Six checks before relying on the stand
Supported use
Record whether the stand and laptop documentation permit the intended powered-off storage or closed-display operation. Keep those uses separate. A fit in a slot does not approve a running arrangement. If the manufacturer’s information is unclear for the exact model and orientation, ask before making the setup dependent on a closed lid.
Assembly dimensions
Measure the actual supported edge with the normal case fitted, noting taper, hinge shape, and feet. Compare the documented slot adjustment, load, and contact requirements. Do not tighten a stand to compress the computer or add loose materials as an undocumented adapter. A suitable product should support the intended assembly through its specified method.
Ventilation and surroundings
Identify the areas that must remain clear and check them in the final placement. Include nearby books, wall surfaces, and a monitor base. Do not infer a thermal benefit from vertical orientation or enclosure material. Operating conditions belong to the laptop and stand instructions, and any abnormal behavior needs the appropriate support response.
Connections and power
Write the exact host path, supported cable, and power arrangement. Include the display count and modes required with the lid closed. Check actual plug clearance at the stand. A cable that fits physically may still be unsuitable for video or data, while a capable cable can still have an awkward route that loads the port.
Open-lid access
Reserve a supported place and route to remove and open the laptop when needed. Include hand clearance, temporary height, and any disconnected peripherals. If access requires moving a heavy display or pulling the laptop by a cable, revise the location. A vertical setup should remain serviceable even if opening the computer is only occasional.
Daily transition
Practice arrival, supported wake, ordinary use, saving work, required storage ejection, and departure. Check the selected camera and audio devices after reconnecting. Keep the routine clear enough to repeat when busy. The real space saving is useful only if the complete workstation can be operated and reset within the documented conditions.

Compare the whole closed-lid workstation
List the functions lost when the laptop is closed: perhaps the built-in screen, camera, keyboard, pointing device, or authentication access. Add the supported external equipment and space needed to replace the functions you actually use. A vertical stand’s low price is not the cost of the completed arrangement if several accessories are required.
Compare that plan with keeping the laptop open in a suitable supported position. The open arrangement may use more visible surface but preserve built-in functions and easier access. The closed arrangement may create a clearer writing area while needing a camera, input devices, and an accessible removal route. Neither is inherently more professional or efficient; the workflow and compatibility decide.
Include the power supply and connected plug bodies in both outlines. A narrow vertical slot can save less practical width when a rigid side connector and cable loop occupy the adjacent region. Avoid claiming the entire laptop footprint is recovered unless the completed arrangement actually leaves that area useful for the intended task.
A second scenario: wake access changed the rear location
Imagine a hypothetical user who places a supported vertical laptop behind a large monitor. The stand fits the device and the external display works in the documented closed-lid arrangement. The user initially judges the setup from a normal active session and overlooks occasional recovery or authentication actions.
The user then follows the official arrival and wake procedure with noncritical work. A particular supported event requires access that is awkward in the rear position. The user does not repeatedly change security or power settings simply to avoid opening the laptop. Instead, the physical plan is revised to preserve a suitable removal and open-lid route when needed.
A side location is compared with the original rear position. It leaves the laptop more visible but allows the user to grasp it correctly after following required disconnection steps. The connected leads remain relaxed, and a supported open-lid surface is available. The stand and dock are not allowed to hang from or pull against each other through their cables.
The user also checks whether a different permitted external-input or accessory-approval arrangement resolves the documented task without changing security policy. Only official guidance for the exact host is relied upon. A method reported for another laptop is not treated as a universal workaround.
The final hypothetical setup includes a normal closed-lid state and a clear occasional access state. Its success does not depend on the laptop never needing attention. The example makes no claim about a particular model’s wake reliability; it shows why a service and recovery route belongs in a space-saving layout even when it is used infrequently.
Keep storage assumptions out of operating advice
A laptop placed in a sleeve for transport is in a different state from a running laptop connected to external equipment. Follow the manufacturer’s shutdown, handling, and storage instructions. Do not infer that a stand intended to organize a closed machine permits operating it inside a travel case, drawer, or other enclosure.
Likewise, a wide enough slot does not establish that a protective case remains appropriate during the intended operation. Check the laptop and case guidance, contact points, and required clearance. If the arrangement needs a case removed, include that handling step in the comparison. Do not compress the case or add arbitrary pads to force the supported dimensions.
When asking for compatibility help, send the laptop model, case, thickness at the supported edge, intended orientation, connected ports, and operating state. Ask separately about physical fit and powered use. A favorable answer about storage should not be interpreted as approval of closed-display operation if that was not the question.
After a supported setup is chosen, retain a private record of the host path and ordinary transition. Recheck it when the laptop, case, dock, or external display changes. A new machine can share the same connector and still have different display, power, ventilation, and access requirements, so the old stand arrangement should not be inherited without review.
Sources and scope
- Apple display troubleshooting - Specific closed-display and external-display checks for applicable Macs.
- Apple accessory permissions - Model-specific accessory-approval considerations; not a security workaround.
Editorial note: This is a research-based planning guide, not a hands-on product review. All worked scenarios are hypothetical. Measurements and compatibility must be confirmed for the exact equipment. Photography supplies context, not proof of a tested arrangement.
Photos are illustrative and come from free-license libraries such as Unsplash; diagrams are original to DeskFinds.