
How to Fit a Drawing Tablet and Keyboard on a Small Desk

Affiliate Disclosure: We may earn a small commission on qualifying Amazon purchases at no extra cost to you. Full disclosure →
A drawing tablet can fit on a desk while leaving no useful place for the keyboard shortcuts that make the work possible. The solution is not always buying the smallest tablet. You need enough supported pen area, a sensible mapping to the screen, and a reachable place for the controls used during each stage of the task.
Quick answer: Identify whether you use a pen tablet or a pen display, then map the active area and the full physical footprint separately. Plan drawing and typing as distinct supported desk states, keeping essential shortcuts accessible. Check cable exits, permitted orientation, and the space needed by your actual strokes. Do not reduce the active area solely to make a crowded layout appear to fit.
Separate the input device from the display
A pen tablet sends input to another screen; a pen display also shows the image on the drawing surface. Their viewing and support needs differ. Confirm which category you use before comparing stands or copying another artist’s layout.
The pen tablet and display tablet comparison covers that distinction. For this layout, record the device’s outer width and depth, active area, controls, connection ports, and any supported orientation. A product described as small can still have a cable or express-key area extending into the keyboard route.
Use the actual driver and device manual to identify supported mapping options. Wacom’s active-area guidance explains that tablet area maps to display area and can be customized for relevant products. That is a software relationship to check, not a guarantee that shrinking any tablet area will feel suitable for every task.
Draw two footprints
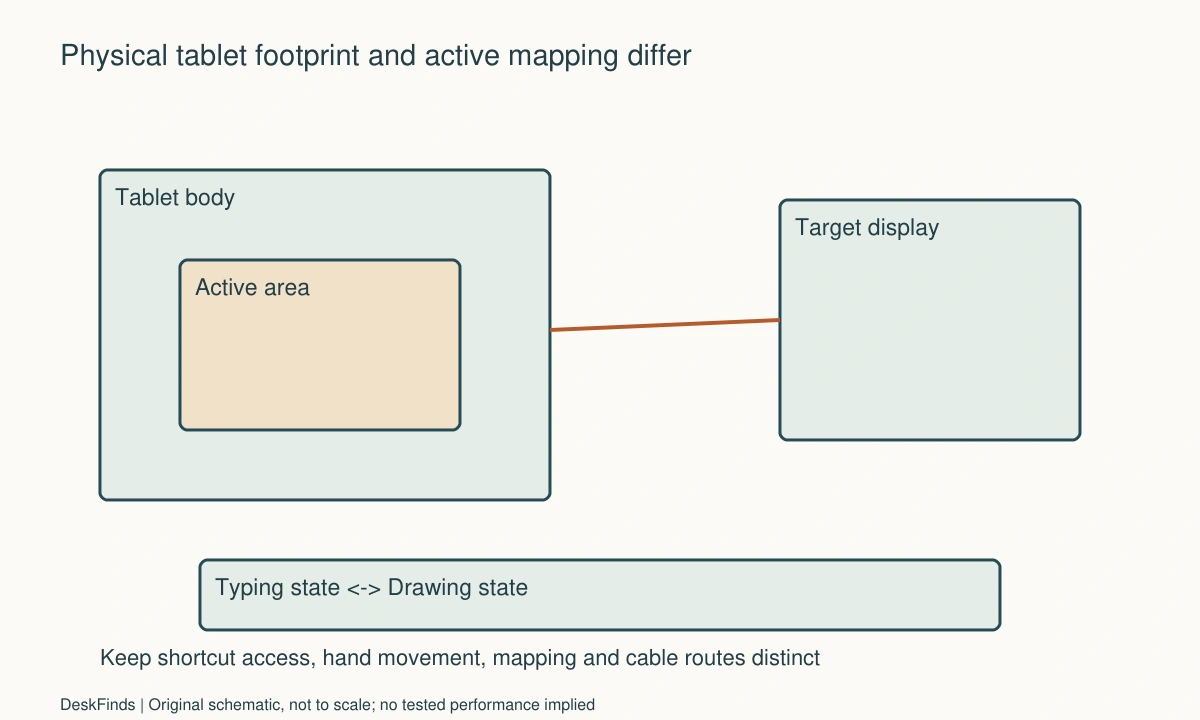
Mark the device’s complete physical outline on the desk, including plugs and attached accessories. Separately mark the active area where the pen is intended to operate. These outlines answer different questions: one determines physical space, while the other affects how your movements correspond to the display.
Include space for the hand and ordinary pen movement beyond the strict active-area boundary. Do not let a keyboard corner, stand lip, or cable sit where you need to reposition the hand. Check the documented contact surface and avoid resting the tablet partly on a soft object to bridge an uneven desk.
For a tablet computer used with a stylus instead, use the case-on tablet stand guide. A cased touchscreen tablet can have a different supported interaction angle and footprint from a flat pen tablet.
Match mapping to the screen arrangement
Check which monitor or screen area the tablet maps to. With multiple displays, an unintended full-desktop mapping can make the pen feel different from the arrangement you expected. Use the manufacturer’s supported settings and understand any aspect-ratio option for the relevant device and driver.
Do not assume the printed active area must always map to every attached screen. Conversely, do not crop the tablet area simply to avoid a physical desk conflict without checking the effect on your work. A small hand movement controlling a large screen area can change precision and the amount of repositioning you need.
The drawing tablet size guide helps compare physical and input-area choices. Make a short harmless drawing in your normal application using supported settings. Treat the result as your own usability observation, not as a universal recommendation for a particular tablet size.

Put shortcuts where the non-pen hand can reach
List the controls used during drawing: undo, brush size, pan, zoom, modifiers, and perhaps tool changes. Identify which are available on the tablet, keyboard, supported remote, or application interface. You may not need the full keyboard directly in front throughout every drawing phase.
A keyboard above the tablet can work for some arrangements, but check the reach and whether it pushes the tablet too close to the desk edge. A side position may preserve drawing depth while increasing lateral reach. Compare the actual shortcuts rather than assuming the same layout suits typing-heavy and drawing-heavy tasks.
If a compact control pad is being considered, use the macro pad placement guide. A new device is worthwhile when it reduces a real repeated action and remains supported by the software environment, not simply because it fills a narrow gap.
Create a typing state and a drawing state
A small desk may work better with two deliberate arrangements than one cramped compromise. In the typing state, the keyboard occupies its normal position and the tablet has a safe supported parking place. In the drawing state, the tablet moves into the working area while essential shortcut controls remain reachable.
Keep the transition simple. Avoid moving a powered device by its cable or balancing the tablet against another screen. Decide where the keyboard goes without covering vents, obstructing a laptop, or resting on an unstable stack. The parking space is part of the layout, not a place to invent each time.
Use a repeatable marker or a private sketch if it helps restore positions, without applying unsuitable adhesive to the tablet or desk. A task transition that takes a few clear actions can be preferable to keeping both devices permanently at awkward angles.
Route cables around the pen path
Check the cable exit in the permitted orientation. A side connector may be comfortable for one hand arrangement and intrusive for another. Follow any supported rotation or handedness settings in the device manual rather than turning the tablet arbitrarily and assuming the driver will compensate.
Leave enough cable for the planned transition between typing and drawing, but keep loose loops out of the hand and chair routes. Do not pinch a lead beneath the keyboard to hold it still. If a detachable cable is replaced, verify the specified connector and data capability rather than choosing only by color or length.
The USB device connection guide offers a general isolation method if another USB device causes difficulty in the shared hub arrangement. For tablet-specific symptoms, follow the device maker’s driver and connection guidance first; do not infer that every input problem is caused by desk geometry.

Worked example: a smaller tablet did not solve shortcut reach
Imagine a hypothetical illustrator on a narrow desk with one monitor and a full-size keyboard. The tablet sits between the keyboard and monitor, so the illustrator reaches over the keyboard to draw. A smaller tablet looks like an easy purchase, but the main problem is the order of devices.
The illustrator outlines a drawing state with the tablet in front and the keyboard in a supported side parking position. The most-used shortcuts are checked individually. Some remain accessible through the tablet’s documented controls, while others still require the keyboard. The layout is revised around those real actions instead of around a generic desk photograph.
Next, the illustrator checks active-area mapping to the intended screen. A change in mapping is evaluated separately from the physical movement of the tablet, so any improvement or difficulty has a clear context. The test drawing includes broad strokes, small details, and the actual pan-and-zoom routine, using nonessential material.
The resulting hypothetical plan may retain the original tablet because its active area suits the work once the keyboard is moved. If the transition remains inconvenient or the footprint still conflicts, a different device can be compared with better requirements. The example does not claim a particular arrangement prevents discomfort or improves artistic performance; it shows how to identify the purchase-worthy constraint.
Keep the workspace recoverable
Store the pen in its intended holder and keep spare nibs or small accessories in a defined location. Do not leave the pen under a notebook or where it can roll into a moving desk mechanism. Follow the manufacturer’s care instructions for the surface and input device.
If the tablet is packed away, check the supported storage method and protect the cable connectors. A device that fits when working may still need a dedicated storage footprint. Include that space when comparing a separate pen display with a compact pen tablet.
Update your layout when the application workflow changes. More keyboard entry, another monitor, or a different mapping can change which device deserves the central position. A useful small desk is adaptable through deliberate supported states rather than permanently optimized for a task you no longer perform.
Six observations for a useful trial
Device category and limits
Record the exact model, whether it is a pen tablet or pen display, and the permitted use and support conditions. Include any required stand. Do not transfer a touchscreen tablet stand recommendation to a different drawing device without confirmation. The physical support and visual task should be established before you rearrange shortcuts or alter active-area settings.
Active versus outer area
Measure both outlines and mark the cable exit. Note where the hand travels during real strokes. A tablet can have a small active area inside a relatively large body, or a useful active area that still needs surrounding hand clearance. Keep those measurements separate so a product’s marketing size does not hide the actual space it occupies.
Mapping choice
Record the target display and relevant supported mapping settings. Change one setting at a time and use a representative harmless drawing to compare. If the cursor behavior feels unexpected, check the mapping before buying another tablet. A successful configuration is task-specific; it should not be described as the universally correct ratio or active-area size.
Shortcut route
List the repeated actions used by the non-pen hand and identify their controls. Check whether reaching them shifts the tablet, crosses the cable, or requires moving the keyboard mid-stroke. A compact remote may help, but it also needs software support and a place on the desk. Compare it with the existing controls before adding another accessory.
State transition
Practice moving from typing to drawing with the devices supported and cables relaxed. Include where the keyboard and pen are parked. If the transition requires stacking equipment or hiding a tablet under a powered laptop, revise the plan. A repeatable change of state should preserve the product instructions as well as clear the central work area.
End-of-session reset
Return the pen to its intended storage, save work, and put the tablet and keyboard in their planned positions. Check that the next session can begin without searching for small parts or untangling leads. The value of the layout lies in supporting the whole work cycle, including setup and recovery, rather than looking efficient only while a drawing is underway.

Compare a device purchase with a layout change
Before buying a smaller tablet, identify which part of the existing arrangement fails. If the keyboard blocks the drawing hand, a different task state may help. If the active area does not suit the work even with clear space and appropriate supported mapping, another device size may be worth comparing. Those are different purchase reasons.
Include the total body and controls when comparing models. A smaller active area does not always mean a proportionally smaller enclosure, and a larger device may offer controls that change where the keyboard needs to sit. Use dimensioned drawings and actual required shortcuts rather than a simple small-versus-large label.
Consider the cost of relearning a workflow as well as the product price. This does not mean a user should keep an unsuitable device; it means the decision should be based on the actual constraint. A short representative trial with harmless work can help identify whether the issue is mapping, reach, support, or missing desk area, without becoming a claimed performance benchmark.
A second scenario: two monitors changed the active mapping
Imagine a hypothetical artist who adds a second display for reference images. The pen tablet remains in its familiar physical position, but the pointer movement feels unexpectedly different. The artist initially considers a larger tablet because the hand seems to need more precise control.
The artist checks the supported mapping settings and discovers that the active tablet area is associated with a different display area than intended. The target screen and relevant aspect-ratio behavior are reviewed through the device’s official guidance. A supported mapping is compared using the same harmless drawing task before any furniture or device purchase is made.
The keyboard shortcuts are then checked separately. A better mapping does not automatically solve a reach problem, and moving the tablet closer does not establish the right display mapping. The artist records both settings and physical positions so the working arrangement can be restored after a driver or monitor change.
If the reference display still needs occasional pen control, the artist consults the device’s documented options rather than inventing an unsupported switching method. A supported display-toggle feature, where available for the exact product, may be relevant, but it is not assumed to exist on every tablet. The essential requirement is written before another accessory is added.
The final hypothetical outcome may retain the original tablet and use a clearer mapping and task layout. Alternatively, a different device can be compared once the genuine active-area requirement is understood. The example shows why a change in screen arrangement belongs in input-device troubleshooting; it does not claim that mapping settings solve every drawing difficulty.
Keep comparison notes about tasks rather than talent
Describe concrete observations: a shortcut requires reaching across the tablet, a cable enters the pen path, or a reference monitor receives unintended input. Avoid turning a layout trial into a judgment about artistic ability or a claim that one size improves skill. The purpose is to identify the equipment arrangement that supports the user’s ordinary process.
Use the same application and a small representative set of actions when comparing. Include broad marks, detailed work, panning, zooming, and the typing that occurs in the real task. If the application or mapping changes, record that as another configuration rather than mixing results into a single impression.
Leave room for an intentional transition. A desk does not need every input device centered simultaneously. A supported typing state and a supported drawing state can be a complete solution when the change is simple and the parking places are defined. Compare the time and handling involved honestly instead of assuming a permanently deployed arrangement is always more efficient.
After choosing the layout, retain the relevant driver settings and a private sketch. Keep small accessories in their intended storage and follow care guidance. The next session should begin from a known supported state, so the benefits of the arrangement are not lost when the desk is cleared for another use.
Sources and scope
- Wacom active-area mapping - Supports the distinction between tablet active area and display mapping for applicable products.
Editorial note: This is a research-based planning guide, not a hands-on product review. All worked scenarios are hypothetical. Measurements and compatibility must be confirmed for the exact equipment. Photography supplies context, not proof of a tested arrangement.
Photos are illustrative and come from free-license libraries such as Unsplash; diagrams are original to DeskFinds.