
Will a Monitor Arm Plate Fit a Recessed VESA Mount?

Affiliate Disclosure: We may earn a small commission on qualifying Amazon purchases at no extra cost to you. Full disclosure →
Matching a monitor’s VESA hole spacing is only part of mounting compatibility. A recess around those holes can prevent a larger arm plate from sitting correctly, and nearby ports or a curved rear housing can add conflicts. The right response is to compare the full mounting interface and approved hardware, not to tighten screws until the gap disappears.
Quick answer: Check the monitor’s mounting instructions, hole pattern, recessed area, and required screw specification against the arm’s plate dimensions and hardware. Use spacers or adapters only when documented as suitable for the exact interface. Do not bridge a recess with arbitrary washers, force the plate against the housing, or guess screw length. Confirm load and movement compatibility separately from hole alignment.
Identify the actual mounting interface
Find the monitor’s exact model and its manufacturer’s instructions for removing the original stand and attaching a VESA mount. Record the hole pattern, approved orientation, required screws, and any supplied adapter. Some displays require a model-specific component before a standard mount can be used.
Use the VESA pattern explanation for measurement terminology. The four-hole spacing does not describe every surface around the holes. A mounting plate can align perfectly on paper while its edges contact raised plastic before its intended mounting surfaces meet.
If the monitor has no documented mounting interface, do not assume an aftermarket clamp or adhesive adapter is appropriate. This guide does not establish compatibility for non-VESA conversion products. Ask the display manufacturer for supported options before investing in an arm or modifying the housing.
Measure the recess as well as the holes
Record the recess’s usable width, height, and depth from product drawings or careful non-invasive measurement. Note rounded corners, protruding features, and the location of controls and ports. Do not insert tools into screw holes to estimate depth or disassemble the display to inspect the rear shell.
Compare those measurements with the arm plate’s outer dimensions, thickness, and release mechanism. A quick-release plate may need an additional movement to attach or detach from the arm. That movement needs clearance too. A plate fitting inside the recess does not automatically mean the release latch remains usable.
For the broader compatibility checklist, see monitor VESA compatibility. Keep the recess question as an additional check rather than treating it as the only concern. The arm must also support the monitor’s documented weight and other specified limits.
Understand what an approved spacer solves
A spacer can create a documented mounting interface when a recess prevents the plate from reaching its intended support surfaces. The Ergotron 97-501 is a specific product example designed for certain recessed VESA 75 by 75 interfaces. Its existence does not make it universal or authorize copying its geometry with household materials.
Check whether the monitor and arm makers specify a compatible spacer or adapter. Obtain confirmation for the exact combination if the manuals do not answer it. The required screw engagement, supplied hardware, and contact surfaces are part of that answer. A spacer changes the assembly and cannot be judged by visual neatness alone.
Do not stack arbitrary washers to make an oversized plate clear the plastic. Do not substitute a longer screw because the original no longer reaches after adding a spacer. An apparently secure connection can still have incorrect engagement or load distribution. Use the specified hardware and procedure, and stop when the documented arrangement cannot be achieved.

Keep screw selection model-specific
The thread, permitted engagement, length, washer arrangement, and any spacer requirement should come from the equipment documentation. Screw length includes material outside the monitor as well as engagement inside it, so a generic length recommendation is not sufficient for every assembly.
A screw that bottoms out can feel tight without clamping the plate correctly, while an unsuitable screw can damage the display. Do not use force to diagnose either condition. If the supplied hardware does not match the documented requirements, contact the relevant manufacturer rather than experimenting through a bag of similar-looking screws.
Keep the original stand hardware and any removed covers together. A monitor may later need to return to its factory stand for service or a room change. Label the parts by model in your own storage system so screws from two monitors do not become mixed during a dual-arm installation.
Check weight and adjustment separately
Verify the monitor’s relevant weight according to the arm maker’s instructions, usually distinguishing the display from the removed factory stand. Include accessories when the arm documentation requires them. A compatible hole pattern and recess do not establish that a gas-spring arm can balance the display within its operating range.
Consider whether the monitor’s width, curvature, or approved orientation affects the arm selection. Follow the arm maker’s stated limits and adjustment procedure. A screen that slowly drops or cannot remain in position should not be held by an improvised strap or tightened beyond the instructions.
If you plan to rotate it, use the portrait clearance guide. The plate fitting the recess does not prove that the screen’s corners, cables, and mounting latch clear surrounding furniture throughout that movement.
Inspect port access with the proposed plate
Look at the cable connectors as installed, not just the empty sockets. A large plate or spacer can change how easily a cable reaches a rear-facing or downward-facing port. Check whether a rigid plug clashes with the plate, whether the cable route bends sharply, and whether the manufacturer’s required access remains available.
Include quick-release access and any security fastener. A monitor can be mountable yet difficult to remove from the arm in a cramped alcove. Plan the supported installation and removal sequence before placing the desk against a wall. Never rely on reaching blindly behind an unsupported display during attachment.
For another limited-space display option, compare the portable-monitor stand planning guide. A freestanding arrangement may sometimes solve the practical workspace problem without forcing a difficult arm interface, but it still requires its own supported stand and footprint check.

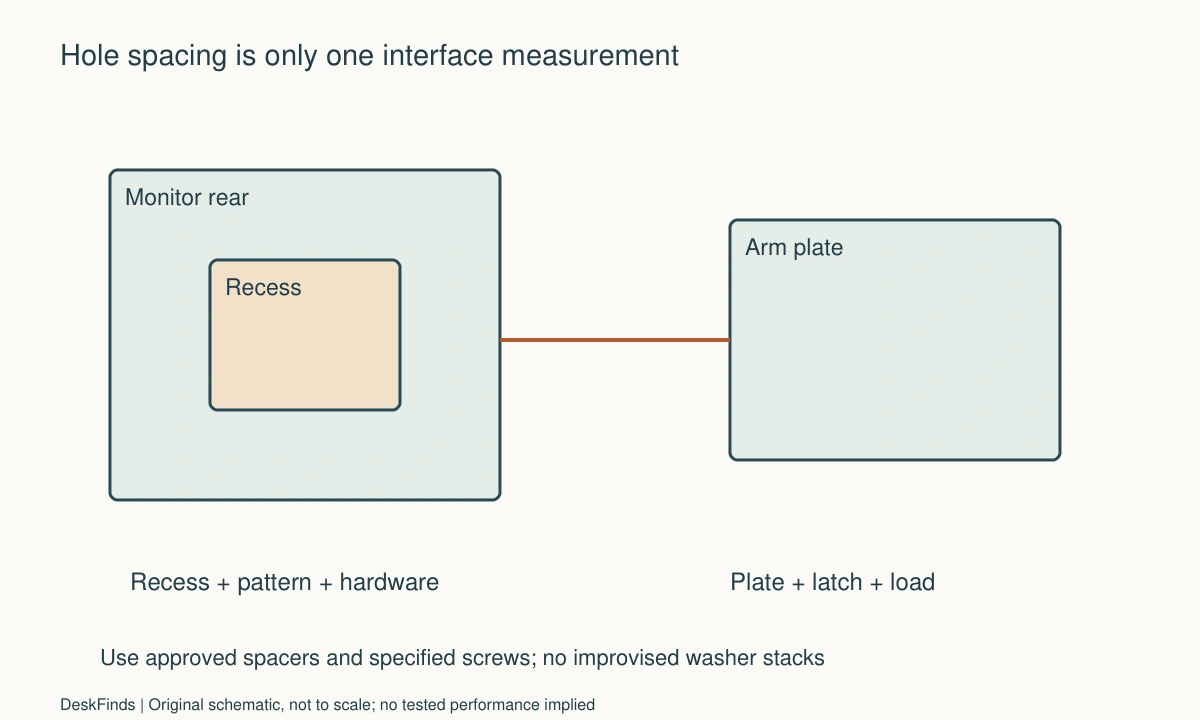
Worked example: the hole pattern matched, the plate did not
Imagine a hypothetical buyer with a monitor whose mounting holes sit in a rectangular recess. The arm listing says it supports the same VESA pattern. The buyer initially assumes that this is complete compatibility and orders the arm without checking the plate’s outer dimensions.
Before installation, the buyer compares the arm drawing with the monitor manual. The plate’s corners would contact the raised housing rather than resting as required. The buyer does not tighten the screws to pull the plate into place. Instead, the buyer asks both manufacturers whether there is a documented adapter or compatible spacer for that combination.
Two possible outcomes are considered. If an approved assembly is specified, the buyer checks its complete hardware requirements and whether ports and release controls remain accessible. If no supported assembly exists, the buyer returns or exchanges the arm for a documented compatible option. The price of a spacer is not the main decision; support for the completed assembly is.
The example also changes the buyer’s next purchase checklist. Hole spacing, recess dimensions, plate outline, hardware specification, load range, and access are now separate rows. No unnamed product is assumed to pass. The value of the check is avoiding a forced installation and identifying incompatibility while the parts can still be returned.
Plan the installation area
Follow the monitor and arm instructions for supporting the display during stand removal and mounting. Use the recommended assistance where required. Clear the area of drinks, loose screws, and objects that could press on the screen. Do not lay a display on an unsuitable surface simply because it is the only open patch of desk.
Keep the arm’s own desk attachment question separate. A plate that fits the monitor does not establish that the clamp is suitable for a hollow, beveled, or obstructed desktop. Use the arm and furniture documentation to verify that part of the assembly before the monitor is attached.
After installation, inspect only as the instructions permit and move the equipment through its supported ordinary range. Watch for cable tension and interference. If an adjustment cannot be completed correctly, stop and resolve the specific issue rather than compensating with unrelated changes elsewhere in the mount.
A purchasing record for recessed mounts
Monitor documentation
Record the exact display model, supported mounting pattern, orientation, and required hardware. Keep any model-specific adapter information with the record. Do not substitute a similar display’s manual because the screen size is the same. Rear housings and mounting interfaces can differ even when two monitors look nearly identical from the front.
Recess geometry
Write usable dimensions and note obstructions without probing or altering the display. Compare the recess with the entire plate, not only the hole centers. If the product drawings are incomplete, ask for a dimensioned plate drawing or manufacturer confirmation. An uncertain measurement should remain unresolved rather than being rounded in the direction that makes the purchase appear to fit.
Approved assembly
Name the exact spacer or adapter if one is required and identify whose documentation supports it. Include the complete screw and washer arrangement specified for that assembly. Do not create a universal rule from one accessory’s compatibility list. If the necessary components are unavailable, compare another supported mount instead of reproducing them with improvised materials.
Load and balance
Check the arm’s required weight range and any additional limits against the monitor and permitted accessories. Record the source of the weight figure. A maximum-load claim is not enough if the arm also has a minimum balance requirement. Separate this check from the VESA interface so one successful measurement does not silently establish every other kind of compatibility.
Ports and release route
Check cable plug bodies, latch travel, and any required retaining fastener. Include how the display will be attached and removed in the actual room. A plate can fit the recess yet leave insufficient room to use its release mechanism. Resolve that access issue before final placement, rather than discovering it during a future service visit.
Return and support decision
Retain packaging and documentation until the supported installation is complete. If a required condition cannot be met, describe the exact mismatch to the seller or manufacturer. Do not modify the monitor, drill the plate, or force hardware merely to avoid a return. A properly supported alternative is a more useful outcome than making an incompatible purchase appear to work.

Keep interface fit and desk attachment on separate pages
The monitor-to-arm interface and the arm-to-desk attachment have different requirements. A supported recess adapter does not approve a clamp on an unsuitable desktop. Likewise, a strong desk does not make an oversized plate or incorrect screw appropriate for the display. Keep a short record for each interface so a successful check does not erase another unresolved question.
For the display interface, record the hole pattern, recess, plate, approved adapter if needed, and complete hardware specification. For the desk interface, record the surface construction, dimensions, permitted mounting method, and any obstructions. Include the arm’s own limits and adjustment requirements between those two records. The whole assembly is only as well specified as its least-resolved interface.
If either side lacks documentation, ask a focused question rather than combining every uncertainty into a general request that the arm fit your desk. Dimensioned drawings and exact model names make a more useful support exchange. Do not let a favorable seller reply about VESA spacing stand in for confirmation of the recess or furniture attachment.
A second scenario: the quick-release latch became inaccessible
Consider a hypothetical user with a recessed monitor interface and an arm plate that appears to fit the recess. The user checks the hole pattern and plate outline carefully, then plans to place the display beneath a shelf close to the wall. The static mounting geometry looks promising.
The arm’s instructions reveal that attaching or releasing the plate requires a specific movement and access to a latch. The proposed shelf position leaves too little room for that operation. The user has not yet installed the screen, so the issue can be addressed through a layout change or another documented compatible support rather than through awkward handling of an unsupported display.
The user asks the manufacturer about the installation and removal sequence for the exact assembly. If a supported alternative sequence exists, its conditions are recorded. If not, the location is revised. The user does not assume that assembling the display elsewhere makes future removal irrelevant; service and cable changes remain part of the workstation’s life.
The final hypothetical plan reserves access for the retaining mechanism and includes appropriate assistance where the instructions require it. Cable plug bodies are checked at the same time. A plate that fits inside the recess is therefore only one completed row, alongside load, hardware, release travel, and the room’s access route.
This scenario demonstrates a less obvious purchase constraint without claiming that a specific latch design is defective. A compact rear interface can be entirely suitable in an accessible location and unsuitable in a tightly enclosed one. Compatibility includes the supported process of attaching and removing the equipment, not just the final static outline.
What an adapter listing should tell you
Look for the intended monitor interface, compatible mount system, supplied hardware, and installation procedure. A generic statement that an adapter solves recessed mounting is insufficient for a different pattern, recess, plate, or display. If dimensions or compatibility are missing, obtain confirmation before assuming a part designed for one interface is universal.
Check whether the adapter changes the assembly’s permitted load, orientation, or required hardware. Use the manufacturer’s stated conditions rather than estimating from the thickness of the material. Retain the instructions with the arm record so a later monitor replacement does not inherit an adapter that was selected for another display.
If the appropriate adapter is unavailable, compare a different supported arm or retain the original stand. That is a complete purchasing decision, not a failure to optimize the desk. Forcing an undocumented assembly to save space can create more difficult handling and service problems than the surface area it appears to recover.
Sources and scope
- Ergotron recessed-interface spacer - Specific recessed VESA accessory example; not a universal spacer or screw recommendation.
Editorial note: This is a research-based planning guide, not a hands-on product review. All worked scenarios are hypothetical. Measurements and compatibility must be confirmed for the exact equipment. Photography supplies context, not proof of a tested arrangement.
Photos are illustrative and come from free-license libraries such as Unsplash; diagrams are original to DeskFinds.