
How to Set Up an Entryway Drop Zone When You Have No Hallway
Affiliate Disclosure: We may earn a small commission on qualifying Amazon purchases at no extra cost to you. Full disclosure →
When a front door opens directly into a living or sleeping area, keys, bags, shoes, and mail often spread to the nearest chair or desk. A drop zone can help, but a narrow console or hook rail must not consume the door’s operating space or the room’s main route.
Quick answer: Map what arrives and leaves each day, then assign a small landing place outside door, lock, and walking zones. Choose hooks, trays, or slim storage from actual loaded dimensions and supported installation. Include parcels and wet-weather items without turning a temporary landing place into permanent overflow. The door and required exit route take priority over storage capacity.
Follow the arrival sequence
Walk in carrying the normal bag, keys, coat, and any daily items. Notice what must be put down before the door can be closed or shoes removed. The first useful surface may be beside the door rather than directly behind it.
Repeat the departure sequence. Keys, access cards, and the work bag should be retrievable without searching or unloading another shelf. Keep security-sensitive items in an appropriate location; visibility and convenience are not the only considerations near an entrance.
Mark door and hardware movement
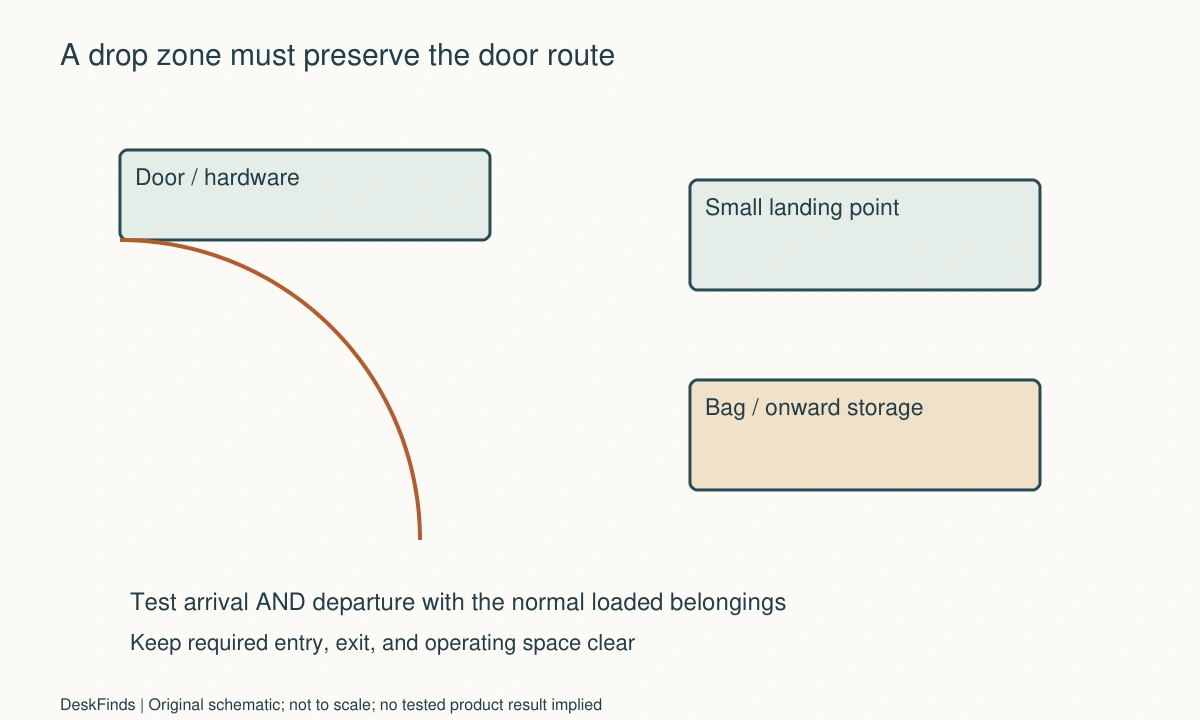
Include the full door sweep, handle, locks, closer if present, and the place you stand while opening or closing. A shallow shelf can clear the panel but still meet the handle. Check nearby cabinet and room doors too.
Keep required exits and access unobstructed. Do not put furniture where the door must stay partly closed to avoid it. A drop zone should make movement easier, not reduce the entrance’s basic function.
Choose the minimum object set
Separate daily essentials from infrequent supplies. One key tray, a suitable bag position, and a controlled mail area may be enough. Shoes, coats, umbrellas, parcels, and charging devices add different space and care needs.
Do not buy a large entryway set before deciding which items genuinely need to live there. A room with no hallway may need distributed storage: a small landing point near the door and bulkier belongings elsewhere.

Compare wall and floor solutions
Wall hooks save floor area only when the wall, fixing, and product support the intended load. Include the item’s projection and swinging straps. A bag hanging from a small hook can occupy much more room than the hook itself.
Floor storage needs a supported footprint and clearance to retrieve items. A narrow bench may be too deep for the route; a slim shelf may still require furniture anchoring. Follow exact installation and use instructions rather than judging from appearance.
Weigh bags in their actual state
A loaded work bag can be much heavier than an empty one. Check the specific hook’s supported load, surface restrictions, installation, and waiting or removal instructions where applicable. Do not assume several hooks share the load unless the system explicitly supports that arrangement.
Command’s product guidance emphasizes using the correct product for weight and surface. That does not mean every adhesive hook suits every bag or rental wall. See bag storage beside a desk for another location that may preserve the entrance route.
Control mail and parcels
Use one incoming-paper location with a regular review point. Large parcels should have a temporary destination outside the exit route. A small tray cannot absorb unlimited deliveries, so give overflow a real process.
Keep addresses, financial information, and other sensitive material appropriately protected. A visible mail slot near a door is not automatically suitable for every document. The paper inbox guide offers a simple next-action system for handling the papers once they arrive.
For the next paper-processing step, use a drawerless-desk paper inbox.
Plan wet-weather handling
Give wet shoes, umbrellas, and clothing a suitable drying or temporary location. Protect compatible floor surfaces and follow product care. Do not seal damp items into a closed bin simply to make the entrance look tidy.
A tray or rack still needs cleaning and a place outside the door sweep. Include the wider shape of an open umbrella or dripping coat when deciding what is practical. The drop zone should not send water toward electrical devices or a charging station.

Keep charging optional
If charging is needed, locate suitable power without cords crossing the entrance. A small shelf can become crowded with adapters and keys. Keep chargers used and ventilated as instructed, and avoid hiding electrical connections under fabric or piles of paper.
A separate charging location may simplify the door area. Do not make a complex electronics station the default answer to a problem that is mainly misplaced keys and a bag.
Example: the console blocks the useful turn
Imagine a door opening directly beside a compact desk. A slim console fits behind the open door, but prevents the user turning with a work bag while closing it. The floor footprint looked acceptable; the arrival action did not.
The user replaces the console plan with a smaller permitted wall landing point and a bag destination farther into the room. The loaded bag’s size and hook requirements are checked independently. Mail gets a limited tray with a review routine rather than a larger surface for accumulating stacks.
The entrance remains usable when a parcel arrives because the household has assigned a temporary location away from the door. The final system contains fewer products and supports both arrival and departure.
Check after ordinary use
| Observation | Useful response |
|---|---|
| Keys still migrate | Move the landing point to the actual arrival sequence |
| Bag blocks the door | Reconsider loaded projection and destination |
| Mail overflows | Add a review routine rather than unlimited trays |
| Wet items enter closed storage | Provide an appropriate separate drying process |
| Furniture catches movement | Reduce footprint or distribute storage |
Use the small-room layout guide to preserve the larger room’s functions. A successful drop zone catches the few things that need a landing place while leaving the entrance free to work normally.
Design the landing point around hands and movement
The first useful place to put keys may be determined by how the door closes, where the lock is, and which hand carries the bag. Walk the sequence rather than choosing the most decorative corner. A small landing point in the actual path can work better than a larger console positioned where nobody naturally stops. Check departure as well as arrival so the system supports finding and carrying the same items back out.
Keep three kinds of belongings distinct. Daily essentials need easy reliable access; temporary arrivals such as parcels need a clear endpoint; bulky possessions can live elsewhere. A room without a hallway may not accommodate a full coat, shoe, bag, mail, and charging station beside the door. Distributed storage can preserve the entrance while still preventing objects from migrating to the work chair.
Security and privacy can change the convenient position. Keys, access cards, mail, and visible documents may need protection appropriate to the household and location. Do not assume an open tray immediately beside an entrance suits every item. Consider what someone can see or reach and follow relevant workplace handling requirements for work credentials or papers. A storage plan should not silently trade those concerns for a tidy photograph.
Check every support in its loaded state. A bag can swing away from a hook, a coat can drape below it, and shoes can extend beyond a slim rack. For adhesive products, exact surface, preparation, load, installation, and removal instructions matter. For furniture, loading and required anchoring remain relevant even when the piece is narrow. The wall and floor are part of the system, not unlimited places to add accessories.
Give wet-weather belongings a separate suitable routine. A damp coat, shoes, or umbrella may need temporary drying before entering closed storage. The destination should not transfer water toward electrical devices, paper, or an unsuitable floor finish. Choose appropriate products and care rather than assuming a general-purpose tray solves every moisture concern.
After a normal week, remove any category that repeatedly overflows or blocks movement. It may need a different destination or a clearer review routine rather than a bigger entrance unit. The successful drop zone is deliberately limited: it catches what needs an immediate landing and moves other belongings onward without reducing the door’s function.

Worked layout: a door opens beside the desk
Imagine a small apartment in which the front door opens directly next to a work desk. Keys land on the keyboard, mail collects under the monitor, and a backpack hangs from the chair. The first purchase considered is a slim console behind the open door.
A floor outline shows the console clears the door panel, but the handle and the user’s turn with a bag need more room. The arrival test fails even though the furniture fits while nobody is moving. The user also checks whether the door can open normally rather than stopping short to protect a new accessory.
The plan changes to a small permitted landing point and a bag destination farther into the room. The loaded backpack’s weight and projection are checked against the exact support. It is not hung from several small hooks on the assumption their capacities add together.
Mail receives one limited tray and a review process. Work documents and sensitive information do not remain in a public-facing open pile. Large parcels have a temporary destination outside the required exit route, so the next delivery does not defeat the new setup.
Wet shoes and an umbrella receive an appropriate separate handling arrangement. The user checks floor compatibility and keeps water away from a charging device. Charging itself is moved elsewhere because it is not necessary at the entrance and would introduce a cable route across movement.
Departure is rehearsed next. The user can retrieve keys, close the work bag, reach the door hardware, and leave without moving a chair or sorting through papers. The setup is then reviewed after an ordinary week, when the room contains its normal belongings rather than only the objects staged for a photograph.
The final arrangement uses fewer products than the console-based plan. It works because storage is distributed according to the arrival and departure sequence. The entrance stays a route first, while the small landing point prevents daily essentials from taking over the desk.
Keep the landing zone deliberately limited
Write a short list of what belongs at the door and what should move onward. A key tray can remain small when mail has a review process and the bag has another destination. If everything arriving is allowed to stay indefinitely, a drop zone becomes general storage and eventually occupies the entrance again.
Check the loaded shape at the time of day it is busiest. A coat, bag, and parcel can combine into an obstruction even when each individual product appears slim. Use the room’s normal traffic rather than an empty-room test. Preserve required exit and door functions regardless of how temporarily a delivery is expected to remain.
If a wall-mounted arrangement is used, retain the exact product and installation information. Replacing a light bag with a heavier one changes the relevant load. A successful previous hook does not approve every future object or surface. Check compatibility before treating the entrance as a permanent place for anything with a strap.
Consider what a visitor or another household member understands. A simple common landing point and clear personal destinations can work without a complicated label system. Sensitive credentials, keys, or papers may need another appropriate location. Convenience should not silently determine their security handling.
Avoid turning the area into a charging station unless charging is a real requirement. Adding adapters and cables can make a straightforward arrival problem harder. If power is needed, route it appropriately and keep devices used as instructed, with no lead across the main movement path or paper pile covering a charger.
Review the arrangement after a week that includes deliveries, wet weather, and a busy departure. Keep the elements that prevent repeated searching or desk clutter. Move the rest elsewhere. A useful no-hallway solution can be modest and distributed; it does not need to reproduce every feature of a large entryway in a few inches beside the front door.
For a different bag destination, see bag storage beside the desk.
Your practical comparison worksheet
Use the following checks with the actual people, objects, and room in your plan. Record a measured value, an observed task result, or the exact product information that answers each point. Keep unresolved details separate from confirmed ones. A result about one feature should not silently establish another: physical fit, ordinary use, support, and care may require different evidence. Work through the checks before ordering, then repeat the relevant actions with the delivered item while the return terms apply. The worksheet is a planning aid rather than a product test or approval for an improvised installation.
1. Arrival sequence
Walk in with the normal bag, keys, coat, and daily items, then close the door and move into the room.
Place the landing point where the action occurs. A decorative corner is ineffective if it requires an unnatural detour or occupies the user’s turning space.
2. Door hardware
Map panel sweep, handle, lock access, closer, and the person’s standing position while operating the door.
Keep required entry and exit functions clear. A shelf can miss the panel yet still hit a handle or force the door to stop short.
3. Item categories
Separate daily essentials, temporary arrivals, and bulky belongings that can live elsewhere.
Use distributed storage when the entrance cannot support every function. One narrow room zone should not become a complete wardrobe, office, and parcel store by default.
4. Loaded supports
Measure and weigh actual bags or coats and check the exact hook, wall, clamp, or furniture requirements.
Include swinging or draping contents. Do not infer capacity from the hook’s size or add independent adhesive ratings without documented system support.
5. Mail flow
Choose one incoming-paper location, an appropriate review routine, and a temporary parcel destination outside the route.
Protect sensitive material appropriately and give overflow an endpoint. Buying more trays should not replace deciding what happens to the papers.
6. Wet weather
Plan suitable temporary handling, drying, floor protection, and cleaning for shoes, umbrellas, or coats.
Do not seal damp items into closed storage or route water toward papers and electronics merely to maintain a tidy-looking entrance.
7. Power
If charging is genuinely needed, check suitable supply, ventilation, controls, and the complete cord route during arrival and departure.
Choose another charging location when the entrance would need a cable across movement or a concealed adapter cluster to support the idea.
8. Departure and review
Retrieve the normal essentials and leave with the room in its everyday state, then review repeated overflow after a week.
Retain the smallest useful system and move nonessential categories elsewhere. A successful drop zone supports both directions of travel.
Sources and scope
- Command hook installation guidance - Primary instructions emphasize exact product, surface, load, and installation. No ratings are added across independent hooks.
Editorial note: This is a research-based planning guide, not a hands-on product review. Worked examples are hypothetical. Follow the exact product instructions and resolve compatibility, installation, and care questions before relying on the arrangement.