
How to Choose Stackable Storage Bins You Can Still Access

Affiliate Disclosure: We may earn a small commission on qualifying Amazon purchases at no extra cost to you. Full disclosure →
A stack of containers can use vertical space efficiently while making the bottom contents difficult to reach. The useful storage capacity is the portion you can retrieve and put back without unsafe lifting, dismantling the room, or leaving lids permanently open.
Quick answer: Match the access method to how often contents are used. Compare removable lids, front openings, drawers, and stack-and-carry designs by their real operating space and manufacturer limits. Plan lifting and return steps for lower containers. A stackable label does not establish unlimited height, load, or compatibility between different product lines.
Inventory by retrieval frequency
Group items as daily, weekly, seasonal, and rarely needed. Keep heavy or awkward belongings out of high lifting positions. Decide which groups need independent access while the stack stays assembled.
A bottom bin used daily is a poor place to hide behind several full top bins. Labels help identify it but do not solve the physical retrieval task. Place frequent groups where the system’s opening method supports repeated use.
Identify the opening mechanism
A removable top lid usually needs overhead space or removal of containers above. A hinged lid needs its own swing. A front-opening bin or drawer can preserve vertical stacking but projects forward or requires a hand approach.
Read the exact product instructions. Do not assume a front door can carry contents as a shelf or that a drawer remains stable when extended. The mechanism and loading are part of the complete storage design.
Measure external and operating dimensions
Record the widest body, lid, handles, feet, latches, and any stacking interface. Internal volume does not tell you whether the product fits a shelf. Include room to release a latch or grip the container.
Then measure the open state. A stack can fit beneath a shelf while the lid cannot rise. A drawer can fit closed while meeting a bed or chair during extension. Map the complete opening and retrieval space using your actual bin mechanism and surrounding furniture.

Check stacking compatibility
Look for the maker’s named compatible models or sizes. A recessed lid may locate a matching bin but not an unrelated one. Similar outside width is not proof of a supported interface.
Do not mix products into an unstable stack merely because they appear to balance. Keep lids and latches installed as directed. A bin designed to nest when empty may use a different arrangement when loaded.
Treat the shelf as another limit
The container, contents, stack, shelf, and furniture each have requirements. A strong bin does not establish the shelf’s capacity. Include the mass of all containers and belongings when comparing with the furniture’s documented limits.
Keep required anchoring and stability measures. Do not remove a shelf or brace to gain an opening without following the furniture’s instructions. See shelf-capacity basics for the distinction between headline storage space and supported loading.
Plan the lifting route
If top containers must move, give them a suitable temporary destination. Do not put a loaded bin on a chair seat or narrow desk edge simply because it is nearby. Test the reach and grip before loading the final arrangement.
Choose manageable groups rather than filling every large bin to its maximum volume. Dense contents can make a modest container heavy. Physical handling requirements are not reduced by transparent walls or convenient labels.
Use transparent sides and labels appropriately
Clear walls help visibility but can become visually busy. Opaque containers may need more precise labels. Label the face visible from the retrieval direction and describe the contents at a useful level.
Avoid a label so broad that several bins must be opened anyway. A short inventory can help seasonal storage, but update it when contents change. A storage system should reduce searching rather than create an elaborate record nobody maintains.

Check empty storage and expansion
If bins are used for moves or temporary projects, compare nesting or folding as permitted. Extra lids can still need storage even when bodies nest. A large set can consume space before it holds anything useful.
Expand after testing the first configuration. A matching product name may change over time, so record the model if compatibility matters. Do not assume future variants will stack identically without checking.
Example: the daily bin is trapped at the bottom
Imagine three matching top-lid bins beneath a shelf. The lowest holds everyday desk supplies. The student must remove two full bins and has nowhere to put them. The stack’s nominal capacity is high, but its daily use is poor.
The student moves frequent supplies into an accessible format and reserves the top-lid stack for low-frequency belongings. A front-opening alternative is compared, including forward clearance and published limits. It is not chosen merely because its door opens in a product photograph.
The shelf load and furniture anchoring are checked before adding more bins. The student labels the visible faces and gives occasional removal a clear landing place. The useful improvement is a complete access route, not just more containers.
Compare the system, not the piece count
| Storage state | Check |
|---|---|
| Closed | Shelf fit and supported stack interface |
| Opening | Lid, door, or drawer operating space |
| Retrieval | Hand access and object removal |
| Temporary placement | Safe destination for displaced containers |
| Return | Easy closing, relatching, and restacking |
For soft seasonal contents, compare vacuum bags and bins. Choose a smaller accessible system if it makes ordinary retrieval reliable. Storage that can only be used after a room-wide rearrangement is less valuable than its capacity figure suggests.
For contents that need a different format, see vacuum bags and bins.
Choose an access model for each layer
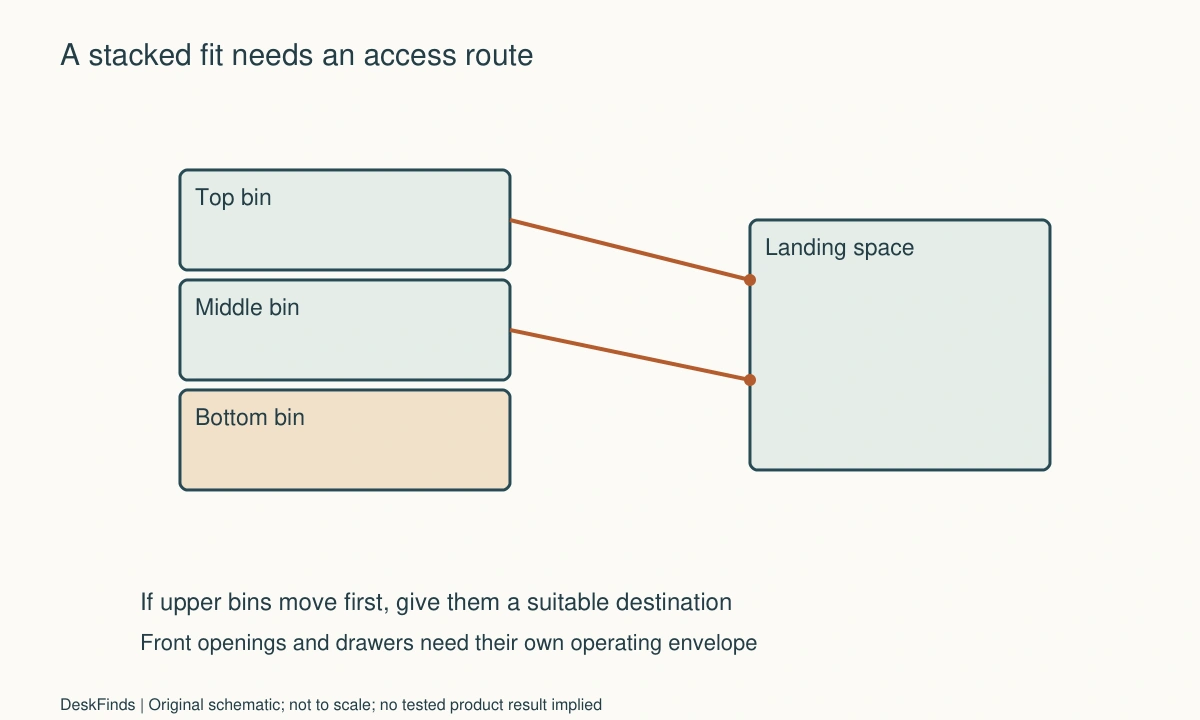
Draw the stack from the side and label the contents of each layer. Add an arrow showing how each group leaves the stack. A top-lid container may move upward and then out, a drawer projects forward, and a front-opening box may need space for a hinged panel and the user’s hand. These different motions should not be reduced to one outside width and depth.
For lower layers, list everything that must move first. Give those objects a stable suitable landing location. If the only available place is the chair needed for work or a narrow desk already carrying equipment, the stack’s practical capacity may be lower than its nominal volume. Rearranging contents by frequency can be more useful than buying a larger or taller set.
Match stacking to documented interfaces. Recesses, feet, latches, and lids can be designed around particular products. Similar-looking containers may balance temporarily without providing a supported stack. Do not combine unrelated models or remove a lid simply to make a top bin sit lower. The maker’s instructions determine the intended loaded arrangement, including any restrictions on opening or moving it.
A shelving unit is not an unlimited frame around the bins. Check its documented capacity, support, and required anchoring with the whole load included. If an adjustable shelf changes position, use the furniture’s supported configuration. Removing a brace or support to create door clearance is not equivalent to moving an adjustable shelf as intended.
Keep labels attached to the visible retrieval face. A useful description identifies the group without needing an elaborate inventory for every small object. If contents change often, use a label method that can be updated appropriately. Transparent sides can help, but they do not replace logical grouping or make a blocked lower container accessible.
Judge the system after ordinary use. Can the same person remove and replace the intended group without leaving lids loose, bins in the walkway, or contents on the desk? That return step is often where a neat initial stack becomes a permanent mess. Choose the smallest supported arrangement that makes both retrieval and return manageable for the actual household.
If storage can change height, compare adjustable and fixed shelves.
Worked layout: three boxes below a low shelf
Imagine three matching top-lid bins beneath a low shelf. The bottom bin contains everyday supplies, the middle seasonal cables, and the top rarely used linens. The stack fits its outside measurements, and the clear walls make the contents visible. Yet using the bottom layer requires removing two full containers.
The user writes the retrieval sequence and discovers no suitable landing place for the top bins. Putting them on the occupied desk or chair would interrupt work and may not support the load properly. The problem is not poor labeling; it is the access model.
The everyday group moves to an appropriate accessible container. The low-frequency contents remain in the stack because occasional removal is manageable. A front-opening alternative is also compared, including door swing, hand access, supported loading, and the room in front. It is not assumed superior merely because an opening appears on the front face.
The user checks the stacking interface and the shelf’s documented requirements. A fourth bin is not added until the full load and installation are understood. The largest outside lidded dimensions are used for shelf fit, while internal capacity remains a separate content question.
A label is placed on the visible face of each retained group. The middle bin’s cables are sorted so one frequently used adapter no longer triggers opening an otherwise seasonal box. This simple content change reduces access work without changing the containers.
The stack is then used during an ordinary week. The user notices that a latch is difficult to release beside the shelf upright. The bin orientation or location is revised within its supported use, and the opening task is tested again. A product fitting an empty shelf had not revealed that hand-access issue.
The final arrangement holds fewer daily items in the stack but provides more useful storage. It can be emptied and restored without a room-wide rearrangement. The successful comparison measures supported stacking, opening, handling, and return, rather than treating container count as the only sign of organization.
Avoid expanding before the first stack works
Use the smallest set needed for a genuine trial. Load suitable contents within the instructions, place the containers in the intended furniture, and retrieve the group used most often. This exposes latch access, hand room, lifting, and landing-place problems before a matching set fills the room.
If a lower layer is awkward, first change the content assignment. Frequent belongings may belong elsewhere while the stack holds seasonal groups. That can preserve useful containers without buying a different system. Do not treat every access failure as evidence that more drawers or a taller shelf is necessary.
When a new mechanism is justified, compare its whole action. A front opening can save overhead access while needing forward space. A drawer can improve retrieval but may have loading and extension requirements. A carry stack can group a project while still needing separation and supported handling. No one format removes the need to plan the person and object movement.
Keep model identity when compatibility matters. A future product with a similar name may use a different lid or base. Check the exact supported interface rather than assuming the first successful stack certifies every later addition. Spare lids and replacement parts can also affect long-term practicality.
For a shared room, make content groups understandable to everyone using them. An intricate inventory that only one person updates can become less reliable than clear simple labels. Ownership, frequency, and next use are often more useful than a highly detailed color system.
At the final check, remove and replace the least accessible group with the desk, bed, and chair in normal positions. The system should restore itself without leaving containers in the exit route or contents spread across the work surface. That complete return is the real test of usable capacity. A stack that holds more but cannot be restored easily may provide less practical storage than a smaller, better assigned arrangement.
Your practical comparison worksheet
Use the following checks with the actual people, objects, and room in your plan. Record a measured value, an observed task result, or the exact product information that answers each point. Keep unresolved details separate from confirmed ones. A result about one feature should not silently establish another: physical fit, ordinary use, support, and care may require different evidence. Work through the checks before ordering, then repeat the relevant actions with the delivered item while the return terms apply. The worksheet is a planning aid rather than a product test or approval for an improvised installation.
1. Content frequency
Label each proposed layer with daily, weekly, seasonal, or rare access and identify the heaviest or most awkward groups.
Keep frequent groups independently reachable. Visibility through a clear wall does not compensate for a lower bin trapped beneath several loaded containers.
2. Opening type
Record removable lid, hinge, front panel, or drawer and the maker’s supported operation for that mechanism.
Map the specific motion rather than assuming all stackable products open while loaded. Do not use a door as a shelf unless designed for it.
3. Complete dimensions
Measure body, lid, feet, latches, handles, and widest outside points alongside the clear storage opening.
Keep outside shelf fit separate from internal capacity. A high-volume label does not establish that the container fits or the contents can pass through its opening.
4. Stack interface
Identify the exact models the maker permits stacking together and any relevant orientation or loading restrictions.
A recessed lid and a similar width are not universal compatibility. Use the documented loaded arrangement rather than balancing an unrelated product on top.
5. Retrieval route
List containers that move first and test hand grip and the object’s removal direction with surrounding furniture present.
Give displaced bins a suitable landing place. A route depending on a loaded chair seat or narrow equipment shelf should be reconsidered.
6. Shelf system
Compare the whole stack and contents with documented shelf and furniture capacity, supports, and anchoring requirements.
Do not remove structural parts or infer shelf strength from bin strength. Space and loading remain independent qualifying checks.
7. Labels
Place an accurate group label on the visible face and keep it easy to update when contents change.
Avoid overly broad categories that force several openings. A label supports the access model but cannot fix a physically blocked or unsafe retrieval task.
8. Return cycle
Retrieve a normal group, use it, close or relatch correctly, and restore the supported stack during ordinary room use.
Retain the system only if the return is manageable. A neat first-day photograph does not show whether bins remain in the walkway after use.
Sources and scope
- Sterilite 25 Quart Latching Box - Example of a container with specified opening and stacking behavior; no universal height or load limit is inferred.
Editorial note: This is a research-based planning guide, not a hands-on product review. Worked examples are hypothetical. Follow the exact product instructions and resolve compatibility, installation, and care questions before relying on the arrangement.