
How to Choose a Laundry Hamper for a Narrow Bedroom
Affiliate Disclosure: We may earn a small commission on qualifying Amazon purchases at no extra cost to you. Full disclosure →
A slim hamper can fit a gap while making it difficult to add clothes, remove a liner, or carry a full load to the laundry area. The right shape depends on the whole routine from changing clothes to washing and returning the empty container.
Quick answer: Measure the parked footprint, lid or opening space, loaded removal shape, carrying route, and actual storage destination. Choose capacity from the wash routine and manageable handling, not the largest volume that fits. Check material care and how damp items are handled. A narrow body is useful only when loading and unloading remain practical.
Define the laundry cycle
How often do you wash, where are clothes changed, and who carries them? A hamper for a nearby washing machine differs from one carried down stairs or to a shared dorm laundry. Separate sorting needs from storage needs.
If clothes are transferred to another bag, include that transfer in the routine. A removable liner may help, but its filled shape and handles need testing. The outer hamper’s dimensions do not describe the bag once clothing bulges outward.
Measure the actual gap
Include baseboards, bed frames, doors, handles, and nearby drawers. The narrowest point can be higher than the floor. A tapered hamper may fit differently depending on its orientation.
Leave practical access based on the actual product and task rather than assuming an exact friction fit. Check whether the container can be pulled out without scraping finishes or catching handles. A container that cannot be removed is difficult to clean and empty.
Check the top opening
A lid needs swing, lift, or removal space. A hamper beneath a shelf can fit closed while the lid cannot open normally. A small opening may also make bulky clothing awkward to insert.
A lidless design avoids one motion but changes appearance and access. Neither format is universally cleaner or better. Choose according to room use, care instructions, and the contents you place inside.

Compare fixed and removable liners
Check how a liner detaches, its care method, and whether it is designed to carry the load. A thin decorative liner may not be a transport bag. Follow the maker’s handling and washing guidance.
Try the removal direction. A full bag may need overhead room or a wide front opening. If it catches the frame, reducing the fill or choosing another design may be more practical than pulling harder on the fabric.
Choose usable capacity
Volume alone does not tell you handling effort. Dense garments and towels can make a large hamper heavy. Choose an amount you can manage appropriately on the actual route, and do not overfill beyond the product’s instructions.
If sorting is needed, compare separate small containers with a divided hamper. Compartments reduce the usable shape for bulky items. A multi-section product may occupy more floor space than expected once frames and handles are included.
Plan for damp items
Follow garment care and product guidance. Do not put wet items into closed storage and assume ventilation holes solve every moisture problem. Give items that need drying an appropriate separate process and location.
Check how the hamper and liner can be cleaned and dried. Fabric, wicker, metal, and plastic have different care requirements. An attractive natural material may be unsuitable for a damp location or a cleaning method you expect to use.
Test carrying and rolling routes
Carry a safe representative load or use a lightweight size mock-up before choosing. Check doorways, turns, stairs, and the place where the hamper waits near the machine. Do not deliberately overload a container to test its strength.
A wheeled hamper needs suitable floors and transitions. Wheels do not remove the need to lift at stairs or thresholds. Handles should be used only as intended, and the loaded unit should remain within the product’s supported use.

Keep bedroom movement clear
Place the hamper outside the chair’s working route, wardrobe operating zone, and path from bed to door. A slim container can still create a recurring obstruction if it occupies the only usable gap.
The small-space troubleshooting guide can help identify which room action is being blocked. Solve that action before choosing another storage accessory.
For the wider room problem, review small-space layout troubleshooting.
Example: a liner cannot leave the narrow gap
Imagine a hamper fitting neatly between a wardrobe and wall. Its frame is narrow, but the full liner bulges and cannot be lifted through the available overhead space. The owner must drag out the entire frame each laundry day.
The owner compares a smaller fill level, a different opening design, and another location. A modestly smaller hamper with a manageable liner proves easier to use. Its lower nominal capacity is acceptable because washing happens frequently.
The route to the laundry area is also checked with the filled liner. A long narrow bag is awkward on the stairs, so handles and shape become more important than matching bedroom decor. The final purchase follows the complete cycle rather than the parked photograph.
Make a comparison sheet
| Stage | Include |
|---|---|
| Parked | Body, feet, lid, handles, and surrounding furniture |
| Loading | Opening size and lid movement |
| Emptying | Liner removal shape and grip |
| Transport | Loaded handling, stairs, wheels, and turns |
| Cleaning | Approved method and drying space |
For shared ownership, see shared dorm closet organization. Choose the hamper that can be used, emptied, cleaned, and returned without disrupting the room. Capacity is valuable only when that cycle remains manageable.
For the surrounding shared storage routine, use shared closet boundaries.
Compare the route from bedroom to laundry
Write the cycle in order: clothing enters the hamper, suitable sorting occurs, a bag or basket leaves the bedroom, the load reaches the washing area, and the empty system returns and is cleaned as needed. A product can be excellent at the first step and poor at the rest. Capacity, handle shape, liner design, and transport route should therefore be evaluated together rather than selected independently.
A removable liner is especially easy to misjudge from empty dimensions. Clothing can make it bulge beyond the frame, and a full bag may need more overhead room to lift out. Check the intended removal method and whether the liner is designed to carry the load. Do not pull on decorative fabric or a seam as though it were a load-bearing handle. Choose another supported design or a manageable fill level if removal becomes awkward.
Match volume to the wash routine. A smaller hamper can be sufficient for frequent washing and easier to carry. A larger one can suit another household but may encourage a load that is difficult to move. Consider towels and bulky garments, not only light clothing. A divided product also changes usable shapes, so compare actual groups rather than assuming two compartments each provide half the nominal volume usefully.
Keep the wet-state decision explicit. Damp clothing may need an appropriate drying step before closed storage, and ventilation features do not replace garment care. The hamper and liner also need their own permitted cleaning and drying method. An attractive woven or fabric product should not be chosen on the assumption that it tolerates every damp location or machine-washing process.
For rolling models, include transitions, thresholds, turns, and stairs. Wheels can help on one floor while adding bulk or requiring lifting at the next obstacle. A floor plan should show where the unit waits near the machine and where it returns. Do not let the transport destination block shared access while the hamper is empty or the laundry cycle runs.
The final choice should simplify ordinary handling for the person using it. A slim body that only fits when wedged tightly between furniture may be difficult to empty or clean. A slightly smaller or differently located container can produce the more useful system even when it holds less at one time.
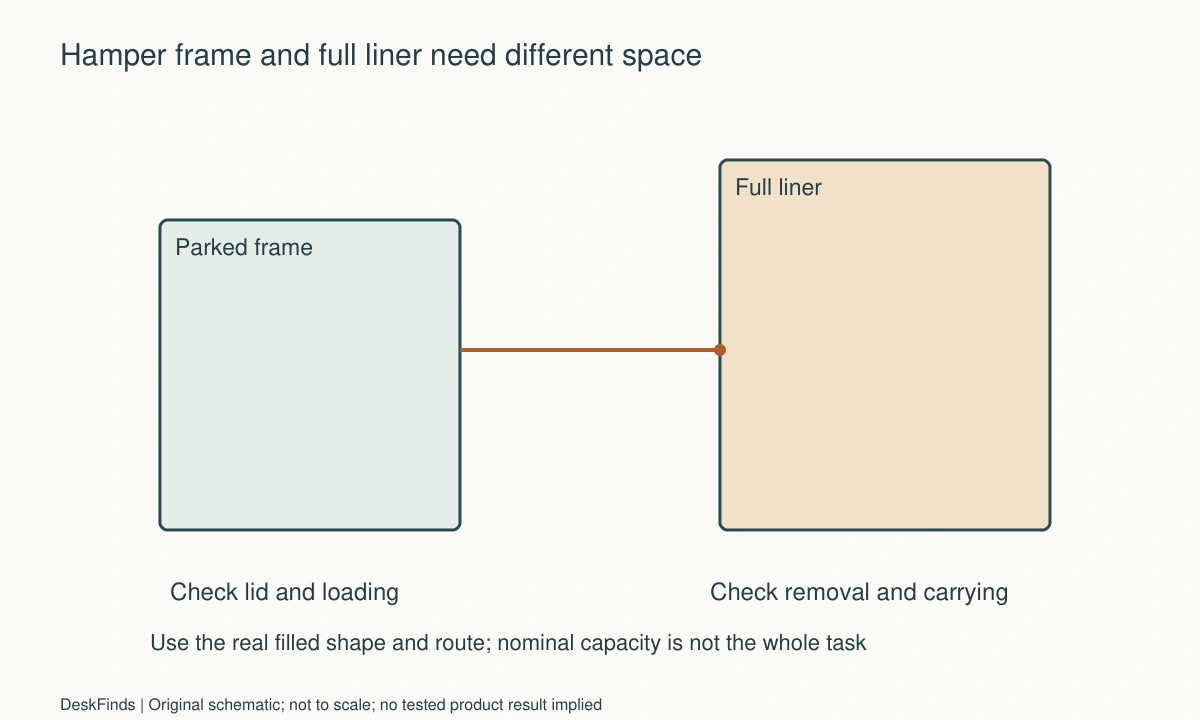
Worked comparison: the slim frame and the full liner
Imagine a narrow bedroom gap between a wardrobe and wall. A tall hamper frame fits neatly, and the user chooses it from the outside width. The product’s empty liner also appears easy to remove.
After a representative load is added within the instructions, the liner expands and catches the overhead shelf during removal. The parked fit has passed, but the emptying task has not. The user tries a manageable smaller fill level and evaluates whether that supports the actual wash schedule.
The frame can be pulled out, but its handle approaches the wardrobe door and the floor route is tight. Moving the whole loaded unit every wash day would create another repeated obstacle. A different opening or a smaller container is compared rather than treating the narrowest advertised body as the final answer.
The carrying test then includes the route to the shared laundry area. Stairs make the loaded bag’s grip and shape important. A wheeled alternative would still need lifting at that point, so wheels are not assumed to solve the entire journey. The user follows the product’s intended carrying method and avoids an overloaded strength test.
The new candidate supports a manageable load and leaves the wardrobe access clear. Its liner has a documented care method and enough removal room. Damp items receive an appropriate separate process instead of being sealed into the hamper to preserve a tidy appearance.
After laundry, the empty container returns to a defined position. Cleaning access is tested, and the hamper can be removed without scraping furniture or catching a door. If another roommate uses a separate system, ownership stays clear through collection and clean return.
The final purchase has less nominal capacity than the original tall model, but it supports the whole cycle. The useful comparison is not slim versus wide in isolation. It is whether the actual load can enter, leave, travel, be washed, and return while the bedroom and shared laundry remain usable.
Compare the smallest practical load
Choose a normal wash group rather than the maximum volume you could force into the container. A hamper’s capacity is useful only when the load can be removed and transported appropriately. The best size may be smaller than the empty room gap suggests, particularly when stairs or a removable liner control handling.
If the household sorts laundry, decide where that action occurs. Sorting at the hamper can use compartments, while sorting near the machine may need a simpler container and suitable temporary space there. Do not add a large divided frame without checking whether the partitions actually support the clothing groups and route.
Inspect handles as intended carrying parts. A decorative top edge or thin liner seam should not be used as a substitute when the loaded grip is awkward. Follow product loading and handling guidance, and choose another design if the correct method cannot be used in the narrow room.
Cleaning and drying are part of the comparison. A liner’s permitted wash method does not necessarily apply to the whole frame or basket. Keep care information and make the unit easy enough to remove for maintenance. A friction fit that makes cleaning difficult can undermine an otherwise tidy parked arrangement.
For shared residences, consider the waiting state. The hamper or bag may need to sit near a machine, queue, or folding area. Keep common access clear and follow the residence’s rules. A large personal container should not become a permanent obstacle in shared laundry space simply because it fits the bedroom well.
Finally, review the routine after several actual wash cycles. Note whether clothing accumulates outside the hamper, the liner is left on the floor, or the container returns to a different location. Those observations identify a missing step or unsuitable shape. Resolve that practical issue before buying another matching hamper. The goal is a complete manageable cycle, not a collection of containers that are neat only while empty.
Your practical comparison worksheet
Use the following checks with the actual people, objects, and room in your plan. Record a measured value, an observed task result, or the exact product information that answers each point. Keep unresolved details separate from confirmed ones. A result about one feature should not silently establish another: physical fit, ordinary use, support, and care may require different evidence. Work through the checks before ordering, then repeat the relevant actions with the delivered item while the return terms apply. The worksheet is a planning aid rather than a product test or approval for an improvised installation.
1. Wash routine
Record frequency, typical garments, sorting, who carries the load, and the destination washing area.
Choose capacity from that cycle. The largest volume fitting a gap is not automatically useful when the resulting load is difficult to handle.
2. Parked footprint
Measure body, lid, handles, feet, and nearby trim at the relevant heights, with doors and drawers considered.
Leave a practical removal route rather than a friction fit. A container that cannot leave its gap is harder to empty, clean, and inspect.
3. Loading opening
Check lid swing or lift, insertion space for ordinary clothing, and any shelf above the hamper.
A closed fit does not establish an open fit. Lidless and lidded products solve different routines rather than one being universally better.
4. Full liner
Inspect the intended removal direction, loaded bulging, handles, attachment, and any overhead or front clearance required.
Confirm the liner is meant to carry the load. Its empty outline and the frame’s width do not describe the filled removal shape.
5. Manageable load
Compare typical contents with the user’s suitable handling and the product’s intended limits, including towels or bulky garments.
Do not overfill simply because space remains. Smaller practical groups can serve frequent washing better than a dense difficult load.
6. Wet-state care
Follow garment and product guidance for damp items, cleaning, drying, and materials used in the hamper or liner.
Ventilation holes or mesh do not guarantee every moisture issue is resolved. Give necessary drying a suitable separate location and process.
7. Transport route
Include loaded grip, doors, stairs, turns, thresholds, wheel suitability, and the waiting position near the machine.
Wheels help only where the route supports them. Plan any required lifting and keep shared access clear during the washing cycle.
8. Return and ownership
Bring the empty system back, clean or dry it as directed, and maintain the correct person’s clothing groups in shared use.
Keep the destination outside chair, wardrobe, and bed-to-door routes. A useful hamper should not depend on perfect daily room rearrangement.
Sources and scope
- IKEA SKUBB laundry bag with stand - Example of a hamper with model-specific footprint and care; no product is claimed hands-on tested.
Editorial note: This is a research-based planning guide, not a hands-on product review. Worked examples are hypothetical. Follow the exact product instructions and resolve compatibility, installation, and care questions before relying on the arrangement.